In the last Back-to-Basics blog, I covered Types of Load Cells. As I continue to cover basic concepts for beginners, this blog details how to troubleshoot a load cell.
7-Step Process for Load Cell Troubleshooting
Have you ever wasted hours troubleshooting a non-working load cell to diagnose the problem? Morehouse technicians have seen many different load cell issues and have lots of experience identifying and fixing the problems. With this experience, we developed a 7 Step Process for Troubleshooting a Load Cell to shorten our calibration lead time (most calibrations are performed in 5-7 business days) and provide better customer service.
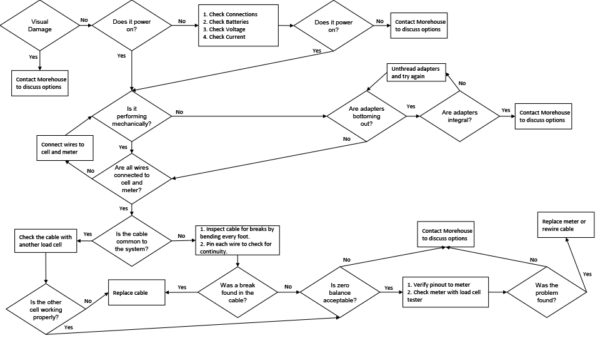
This 7-step process outlined above and explained below can help you save countless hours trying to diagnose the problem with your load cell.
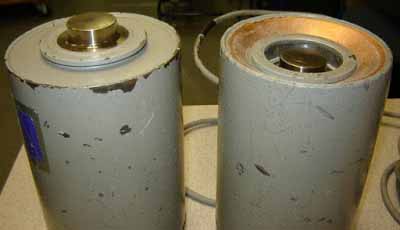
- Visually inspect the load cell for noticeable damage. If it is damaged, contact Morehouse to discuss options.
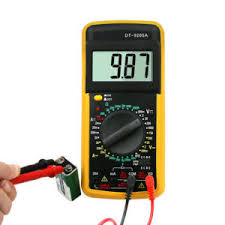
- Power on the system. Make sure all connections are made and verify batteries are installed and have enough voltage. Check the voltage and current on the power supply. If it still does not power on, then replace the meter. An inexpensive multimeter like the one pictured below can be used for Steps 2, 6, and 7.
- If everything appears to be working, but the output does not make sense, check for mechanical issues. Some load cells have internal stops that may cause the output to plateau. Do not disassemble the load cell as it will void the manufacturer's warranty and calibration. The best example of this error is that the load cell is very linear to 90 % of capacity. Then either the indicator stops reading, or the output becomes severely diminished. The data will normally show very poor linearity when using 100 % of the range and very good linearity when only using the data set to 90 % of the range. Morehouse can likely fix this error and should be contacted for more information.
- Make sure any adapters threaded into the transducer are not bottoming out. If an adapter is bottoming out and is integral, then contact Morehouse to discuss options.
- Check and make sure the leads (all wires) are properly connected to the load cell and meter. If the cable is common to the system, check another load cell and verify that the other cell is working properly. If the other load cell is not working, then contact Morehouse to discuss options.
- Inspect the cable for breaks. With everything hooked up proceed to test the cable making a physical bend every foot. Pin each individual connection to check for the continuity of the cable.
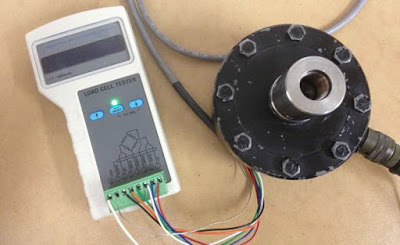
- Use a load cell tester or another meter to check the load cell's zero balance. If you do not have a load cell tester you can check the bridge resistance with an ordinary multimeter. A typical Morehouse shear web load cell pins (A & D) and (B & C) should read about 350 OHMS ± 3.5. If one set reads high and another low (ex. (A & D) reads 349 and (B & C) reads 354), then there is a good chance that the load cell was overloaded.
Note: Different load cells use different strain gauges and have different resistance values. It is essential to check with the manufacturer on what they should read and the tolerance.
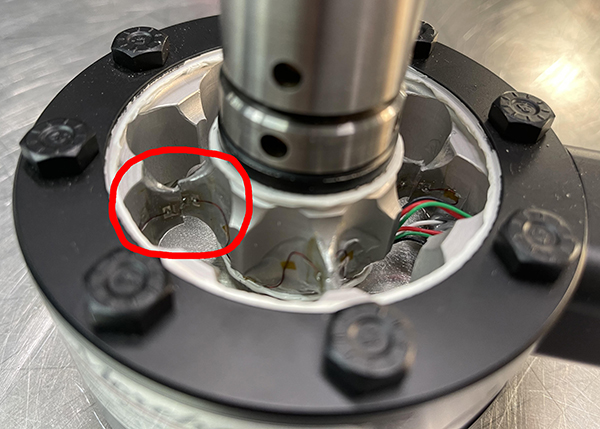
Inside of an overloaded shear web load cell showing a clear break of the web element
Diagnose with a Load Cell Tester
A Morehouse load cell tester can be used to test for the following:
- Input and Output Resistance
- Resistance difference between sense and excitation leads
- Signal Output
- Shield to Bridge
- Body to Bridge
- Shield to Body
- Linearity
Watch this video showing how the load cell tester works.
Overloaded Load Cell
It is important to note that if a load cell has been overloaded, mechanical damage has been done that is not repairable. Overloading causes permanent deformation within the flexural element and gauges, which destroys the carefully balanced processing. While it is possible to electrically re-zero a load cell following overload, it is not recommended because this does nothing to restore the affected performance parameters or the degradation of structural integrity.
Morehouse stocks common capacity load cells and most equipment is available in 1 week, with calibration performed using deadweight primary standards. Shorter lead times are available upon request, and Morehouse always aims to provide superior customer support. Learn more about our wide selection of load cells.
In our next Back-to-Basics blog, I will cover load cell indicator basics.
Back-to-Basics Series:
- Force Calibration and its Importance
- How a Transducer Measures Force
- Compression and Tension Force Calibration
- Calibration versus Verification
- Measurement Uncertainty
- Load Cell Terminology
- Types of Load Cells
- Load Cell Troubleshooting
- Load Cell Indicator Basics
- Force Measurement Glossary of Terms
I take great pride in our knowledgeable team at Morehouse, who will work with you to find the right solution. We have been in business for over a century and focus on being the most recognized name in the force business. That vision comes from educating our customers on what matters most, and having the right discussions relating to force calibration basics so that everyone speaks the same language.
If you enjoyed this article, check out our LinkedIn and YouTube channel for more helpful posts and videos.
Everything we do, we believe in changing how people think about force and torque calibration. We challenge the “just calibrate it” mentality by educating our customers on what matters, and what causes significant errors, and focus on reducing them.
Morehouse makes simple-to-use calibration products. We build fantastic force equipment that is plumb, level, square, rigid and provide unparalleled calibration service with less than two-week lead times.
Contact us at 717-843-0081 to speak to a live person or email info@mhforce.com for more information.
# Load Cell Troubleshooting #Troubleshooting #Calibration Lead Time #Overload


