Top 5 Common Force Measurement Errors
Top 5 Common Force Measurement Errors - At Morehouse, we strive to replicate the loading conditions a customer may be using. Some other labs, may not follow this process and the additional measurement uncertainty from not replicating use, may create a significant error source. Below are the top 5 common force measurement errors that may invalidate the calibration results.
#1 Pin Size is Critical with Tension Links
 Errors of up to 20 times the manufacturer's specification are possible if the proper pin size is not used.
- Sending the pin used with the instrument is recommended, to best replicate use during calibration.
- If the pin is not available, Morehouse will list the pin size used to calibrate the device on the certificate of calibration.
- If a pin of a different size or material is used, it is quite possible that the instrument will not meet the manufacturer's specifications.
#2 Loading the Shoulder vs. Thread Loading
 Load Cells will behave differently depending on whether they are shoulder loaded, or thread loaded. Varying the thread depth on a shear-web-type load cell can result in measurement errors of 0.5 %, or more.
- Locking an integral threaded adapter into shear-web cells is the recommended practice to avoid these errors. If an integral adapter cannot be locked into place, we recommend the cell be shoulder loaded, and any adapters placed between the cell and force applied also be supplied for calibration.
Note: Non-shear-web type cells may have additional errors from shoulder loading. The end-user's adapters should be supplied for calibration, we have observed errors of up to 5 % when different adapters are used during calibration.
#3 Load Cell Bolting, Thread Class, and Applied Torque
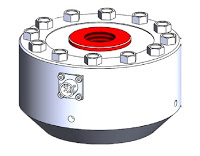
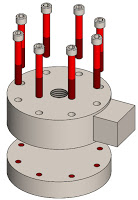
 If a load cell is bolted to a base or adapter of similar size, we recommend sending the cell attached to its base for calibration.
- If the load cell is attached to a larger machine or device, error sources from different classes of threads, materials, or bolting procedures (including torque applied) can be quite large. The bolts used to hold the cell in place should be sent with the cell, and if possible, even a piece of similar material and flatness as the machine should be sent to best replicate use
- Variability between bolting techniques, material hardness, and flatness can all contribute to significant error, which can be difficult to identify away from the point of use.
#4 Top Adapter Hardness and Flatness
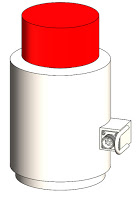
 Top adapters with different hardness values may affect the strain level in the load cell column or web and result in different measurement outputs. We have observed errors of up to 0.15 % from varying just the material on top compression pads.
- Adapters and bases that are not flat may produce additional errors. We have conducted several tests and found repeat-ability errors to be about three times higher when the surfaces interfacing with the load cell are not flat.
- We highly recommend the end user send us any top adapter which is used with the load cell.
#5 Not Following Published Standards
- Our last blog dealt with the top 3 ASTM E74 load cell calibration mistakes which can be found here. There are several examples where calibration labs simply do not follow what is published in the standard.
- We have observed several laboratories violating the ASTM E74 standard. Specifically in not taking a non-zero test point below 10 % and assigning a loading range below the first calibrated test point. Per Section 7.2.1 of ASTM E74-13a states “In no case should the smallest force applied to be below the lower limit of the instrument as defined by the values: 400 x resolution for Class A loading range & 2000 x resolution for Class AA loading range” Per Section 8.6 of ASTM E74-13a “The loading range shall not include forces outside the range of forces applied during the calibration” This means, Zero cannot be the first test point.
- There are other documents like ISO 17025 that are not followed. We have seen numerous calibration reports mentioning traceability to NIST without any consideration of measurement uncertainty. "Traceable to NIST" is not correct. The proper statement should be traceable to SI Units, through NIST. This topic will be further expanded upon, in a future blog.
Top 5 Common Force Measurement Errors - conclusion
These are just some examples of the Top 5 Common Force measurement errors. Force calibration requires attention to details, such as alignment, adapters, pin sizes, thread engagement, and wiring. Morehouse offers a force calibration workshop designed to make the participant a better calibration technician by providing the knowledge to obtain more accurate force measurements, along with tools to create a full measurement uncertainty budget as required by ISO/IEC 17025 and ANSI Z540.3. To become or have someone become a better calibration technician, click here.
If you enjoyed this article, check out our LinkedIn and YouTube channel for more helpful posts and videos.
Everything we do, we believe in changing how people think about force and torque calibration. Morehouse believes in thinking differently about force and torque calibration and equipment. We challenge the "just calibrate it" mentality by educating our customers on what matters, and what causes significant errors, and focus on reducing them.
Morehouse makes our products simple to use and user-friendly. And we happen to make great force equipment and provide unparalleled calibration services.
Wanna do business with a company that focuses on what matters most? Email us at info@mhforce.com.
# Top 5 Common Force Measurement Errors # Force Calibration


