Accuracy and Precision in Force Measurement Simplified
When taking measurements, two critical concepts to understand are Accuracy and Precision. While related, Accuracy and Precision describe different aspects of measurement quality.
Accuracy refers to how close a measurement is to the true value. A measurement is considered accurate if it is close to the actual or accepted value of what is being measured. Precision, on the other hand, refers to how consistent or reproducible measurements are when repeated. Precise measurements will cluster closely together, even if they are not necessarily close to the true value.
The International Vocabulary of Metrology describes Measurement Accuracy and Measurement Precision.
Measurement Accuracy:
- Refers to how close a measured value is to the true or standard value of the quantity being measured
- Indicates the closeness of agreement between a measured quantity value and the true quantity value
- Describes how close a measurement is to the "correct" or accepted value
- It can be referred to as Error, Bias, or Measurement Error and is typically a Type B Evaluation
Measurement Precision:
- Refers to how close repeated measurements of the same quantity are to each other
- Indicates the closeness of agreement between measured quantity values obtained by replicate measurements on the same or similar objects under specified conditions
- Describes how reproducible or consistent measurements are when repeated
Type A and Type B refer to two different approaches for evaluating measurement uncertainty:
Type A Evaluation:
- Based on statistical analysis of a series of observations
- Calculated from repeated measurements under the same conditions
- Uses methods like calculating the standard deviation of the mean
- Characterized by experimental data and statistical analysis
- Example: Taking multiple measurements and calculating the standard deviation (Precision)
Type B Evaluation:
- Based on scientific judgment using all available information
- Does not use repeated measurements
- Uses other sources of information like manufacturer specifications, calibration certificates, handbooks, etc.
- Characterized by non-statistical methods and professional judgment
- Example: Using the accuracy specification from an instrument's datasheet (Bias, % Error, Measurement Error)
Key differences:
- Type A uses statistical analysis of experimental data
- Type B uses other sources of information and scientific judgment
- Type A requires repeated measurements, Type B does not
- Type A quantifies random errors, Type B can account for both random and systematic errors
Key relationships:
- Type A evaluations primarily capture precision/repeatability
- Type B evaluations primarily capture accuracy/systematic effects
- Both Type A and Type B contribute to the overall measurement uncertainty
- Good accuracy requires minimizing systematic errors (Type B)
- Good precision requires minimizing random errors (Type A)
- High accuracy does not guarantee high precision, and vice versa
Both Type A and Type B evaluations contribute to the overall measurement uncertainty. The total uncertainty is typically calculated by combining the Type A and Type B components. Using both types allows for a more comprehensive assessment of measurement uncertainty.
Note: It is important to note that any Measurement Uncertainty Budget will likely contain more than just the Accuracy and Precision.
A proper budget will minimally have the measurement uncertainty of the reference standard(s) used to perform the calibration, resolution, repeatability (Precision), reproducibility, stability (typically obtained through multiple calibrations), environmental factors, and much more!
Morehouse has several articles and guidance documents on calculating measurement uncertainty.
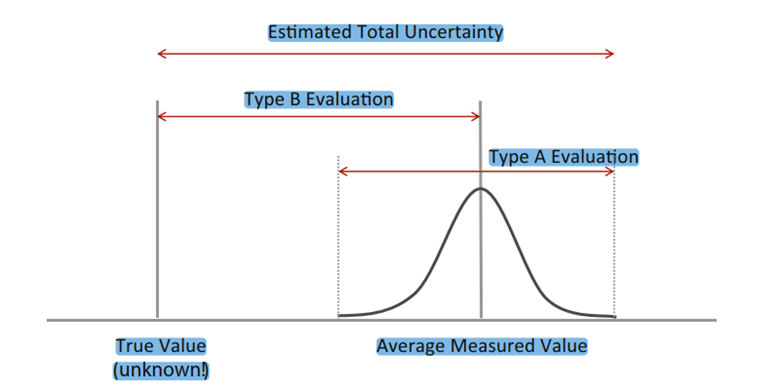
Figure 1 Expressing Accuracy and Precision Properly
Thus, when starting to define accuracy (bias, measurement error) and precision (repeatability), we are starting to look at Type B (Accuracy) and Type A (Precision) contributions to our overall measurement uncertainty.
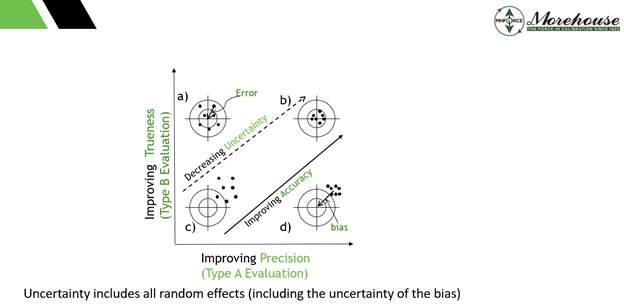
Figure 2 Accuracy and Precision in Force Measurement
In this figure:
These concepts can be visualized using a target analogy:
The a) target shows measurements that have a low bias (Type B Evaluation) on average (centered on the bullseye) but not precise (spread out).
The b) target shows measurements that have low bias (Type B Evaluation) and are precise (type A Evaluation) - clustered tightly around the true value.
The c) target shows measurements that have a higher bias (Type B evaluation) and Precision (Type A Evaluation) uncertainty components. It might be said that it is not accurate or precise.
The d) target shows measurements that are precise (clustered tightly) but has high bias (far from the bullseye).
Understanding Accuracy and Precision in Force Measurement
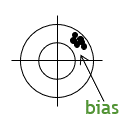
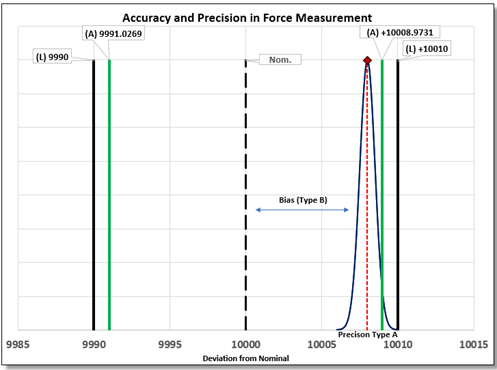
Figure 3 Accuracy and Precision in Force Measurement (Morehouse)
Figure 3 might be an excellent example of using a calibration lab with low measurement uncertainties (cough, cough, Morehouse). In this example, the pass criteria are as follows: Pass anything with less than a 2 % PFA (Probability of False Accept) using specific risk. That means any point below 9991.0269 and above 10008.9731 would have less than a 2 % chance of saying the instrument is good when it is bad.
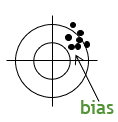
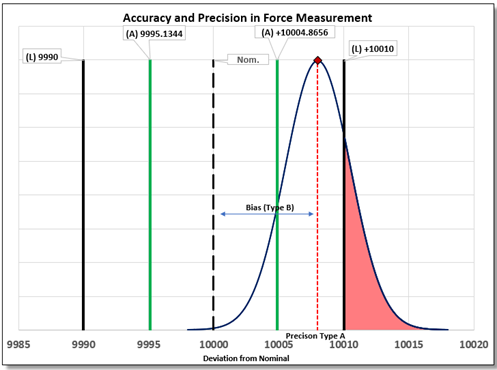
Figure 4 Accuracy and Precision in Force Measurement (Lab with higher Measurement Uncertainty)
Compare Figure 3 with Figure 4. Assuming the same instrument, we have switched calibration suppliers, and our new supplier has Measurement Uncertainty, which is five times higher.
Our acceptance limits have changed in this case, and there is now a 21.186 % PFA.
This means there is a 21.186 % that the calibration is falsely accepted (the lab says it passes when it actually fails).
Notice the bias is the same in that the measured value is 10008 for both examples. The precision and measurement uncertainty of the calibration laboratory have changed. Meaning our acceptance limits have decreased quite a bit.
One laboratory can make the measurement and say it passes with 0.003 % PFA, and the other one cannot pass the instrument.
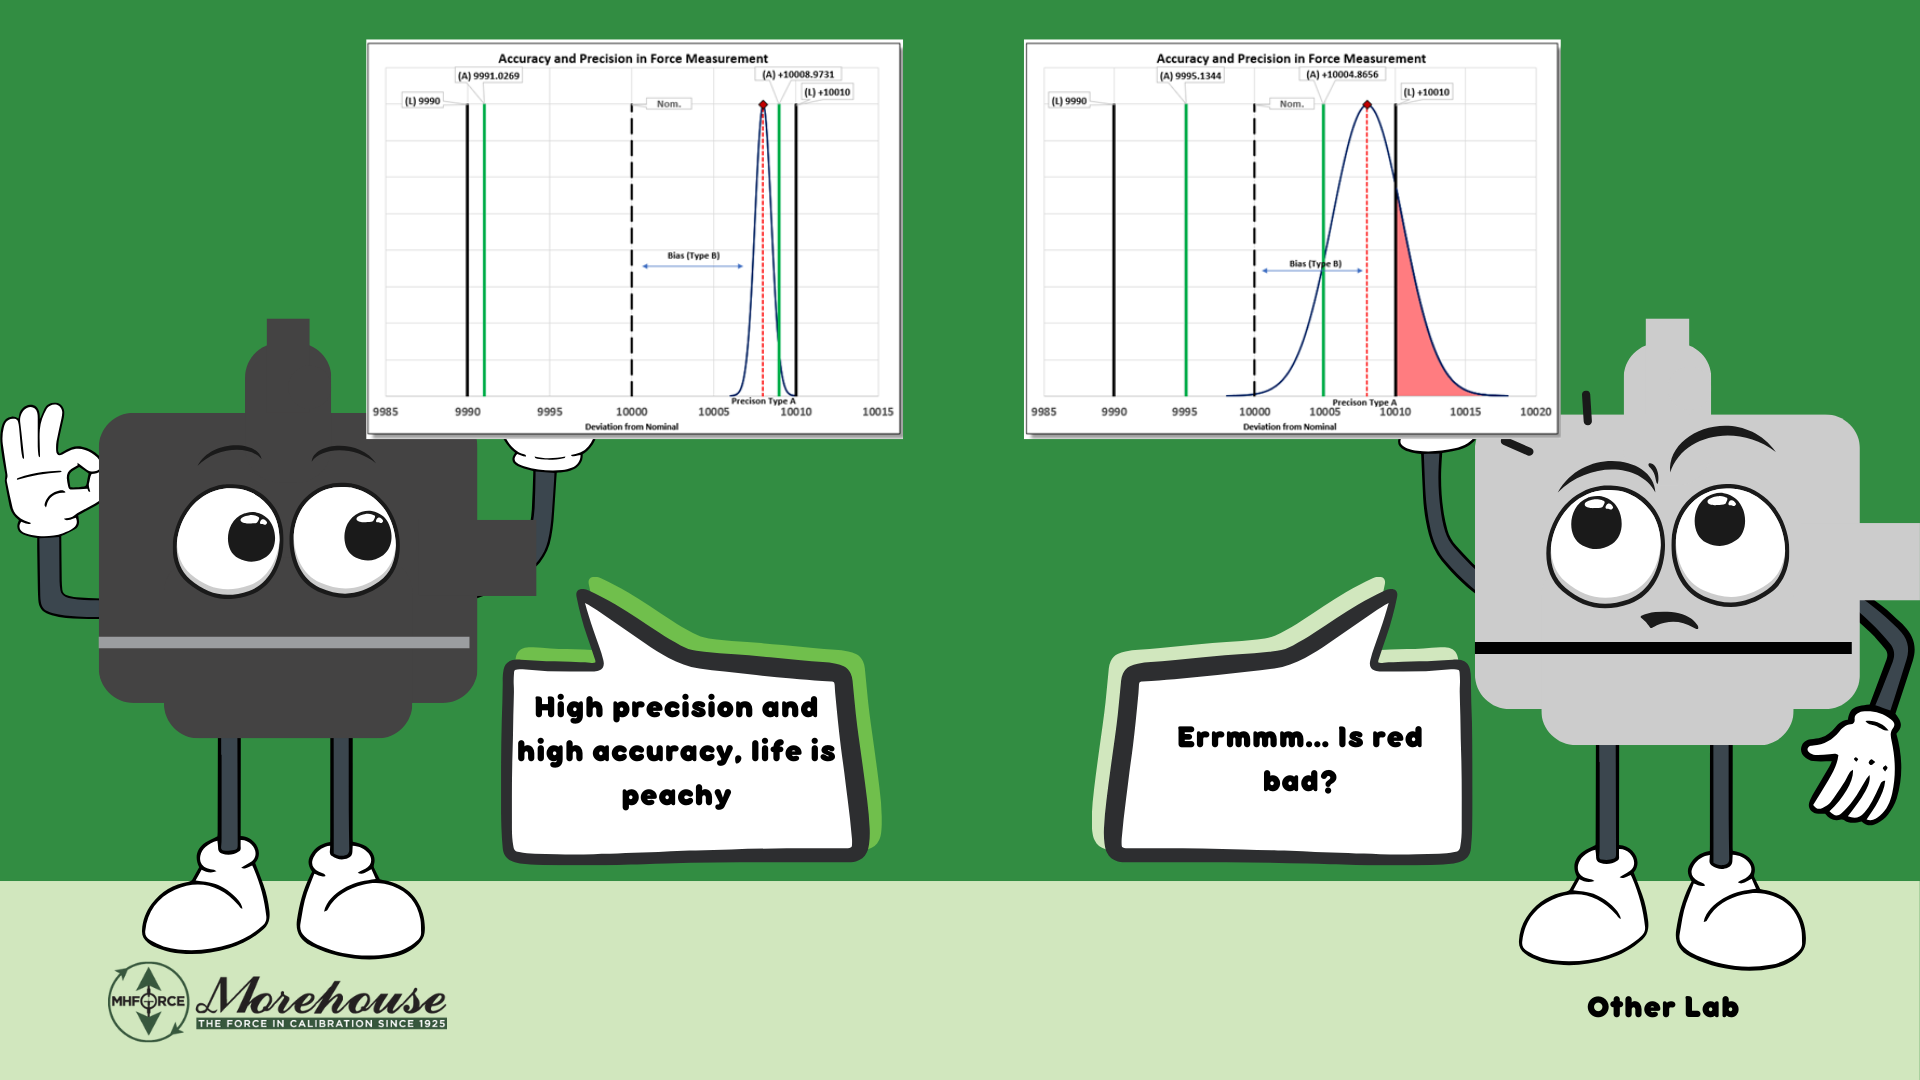
Figure 5 Accuracy and Precision Cartoon
Some key points about Accuracy and Precision in force measurement:
Measurements can be precise without being accurate or accurate without being precise. The ideal is to have both.
While accuracy refers to how close a measurement is to the true value, precision indicates the consistency of repeated measurements.
Precision can be improved by using higher-resolution instruments or taking more measurements, but this does not necessarily improve accuracy.
Accuracy requires proper calibration of instruments and elimination of systematic errors.
Type A and Type B Evaluations: These approaches provide a comprehensive assessment of measurement uncertainty. Type A focuses on statistical analysis, and Type B focuses on scientific judgment and available information.
Measurement Uncertainty Budget: A thorough budget should include various factors beyond accuracy and precision, such as reference standards, resolution, reproducibility, stability, and environmental factors.
Visual Representation: The target analogy effectively illustrates the relationship between accuracy and precision, helping to understand different measurement scenarios.
Impact on Calibration: As demonstrated in the comparison between Figure 3 and Figure 4, the measurement uncertainty of the calibration laboratory can significantly affect the acceptance limits and the probability of false acceptance (PFA).
Importance in Metrology: Both accuracy and precision contribute to the overall uncertainty of a measurement, making them essential considerations in metrology practices.
Accuracy and Precision as they relate to instrument specifications:
Do manufacturers rate the accuracy of their devices without considering precision or repeatability?
From a bit of research on this, some do, and some do not.
The key is understanding exactly what is included in the accuracy figure, which might not be something many manufacturers publish.
For example, many scale manufacturers incorporate resolution, repeatability, and linearity into their accuracy specifications.
However, if a measurement and test equipment (M&TE) manufacturer omits important factors from their accuracy rating, these omissions will become evident during calibration, especially when subsequent calibrations fail.
A typical example is low-cost hygrometers, which often overstate their accuracy.
Many are advertised with a ± 1 % RH accuracy yet consistently fail calibration due to missing critical parameters in their accuracy specifications.
Many of these devices never pass calibration.
Even after you adjust them to nominal at one humidity (at one temperature), they are not repeatable, have bad hysteresis, poor linearity, etc.
This is one example of several that exist in industry.
Thus, if you want to know what's included in an accuracy specification, you likely need to call the manufacturer and do some research for yourself.
Accuracy and Precision in Force Measurement Conclusion:
Understanding these concepts has several practical implications:
- Calibration Selection: Choosing a calibration laboratory with lower measurement uncertainties can lead to more reliable and accurate results.
- Quality Control: Proper understanding of accuracy and precision helps set appropriate acceptance criteria and reduce the risk of false acceptances or rejections.
- Continuous Improvement: By focusing on accuracy and precision and the impact on the overall measurement uncertainty, organizations can continuously improve their measurement processes and overall quality control.
In the ever-evolving field of force measurement, Morehouse can help with staying informed.
More Information about Morehouse
We believe in changing how people think about force and torque calibration in everything we do.
This includes setting expectations and challenging the "just calibrate it" mentality by educating our customers on what matters and what causes significant errors.
We focus on reducing these errors and making our products simple and user-friendly.
This means your instruments will pass calibration more often and produce more precise measurements, giving you the confidence to focus on your business.
Companies around the globe rely on Morehouse for accuracy and speed.
Our measurement uncertainties are 10-50 times lower than the competition, providing you more accuracy and precision in force measurement.
We turn around your equipment in 7-10 business days so you can return to work quickly and save money.
When you choose Morehouse, you're not just paying for a calibration service or a load cell.
You're investing in peace of mind, knowing your equipment is calibrated accurately and on time.
Contact Morehouse at info@mhforce.com to learn more about our calibration services and load cell products.
Email us if you ever want to chat or have questions about a blog.
We love talking about this stuff.
Our YouTube channel has videos on various force and torque calibration topics here.


