Load Cell Measurement Errors: Can a Load Cell Adapter Plate or Block be Interchanged Without Introducing Additional Errors?
Load cell measurement errors - Hardness of the top block used for calibration can result in errors as high as 0.5 % of applied force.
We have seen large errors from customers switching out top blocks or worse, not sending a mating top block for calibration. A simple rule is always to send the top block adapters with the load cell for calibration.
If switching out adapters, the new adapter must consist of the same material and have identical characteristics, it may be substituted without introducing additional error. Though some materials will harden with repeated use; there could be a difference. The material of the top block is softer and has a lower hardness than the load cell it is used with. If a top block is replaced, the recommendation is to have the force-measuring equipment checked or calibrated to ensure errors are accounted for.

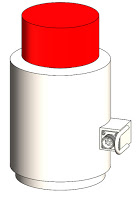
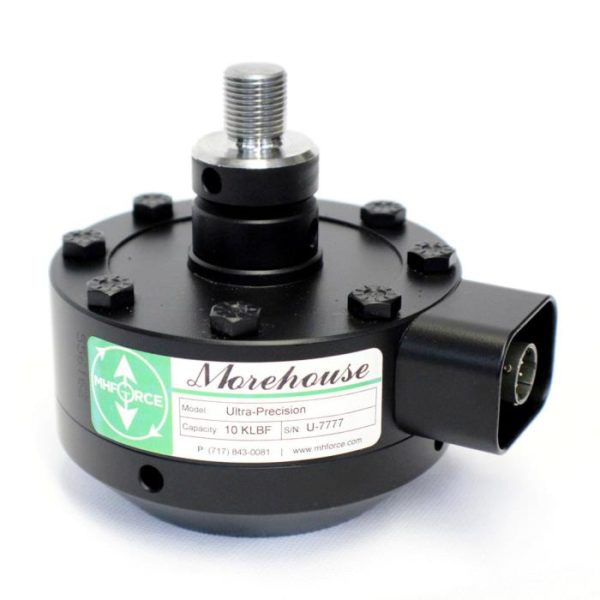
Load Cell Measurement Errors Figure 1 A Multi-Column Load Cell
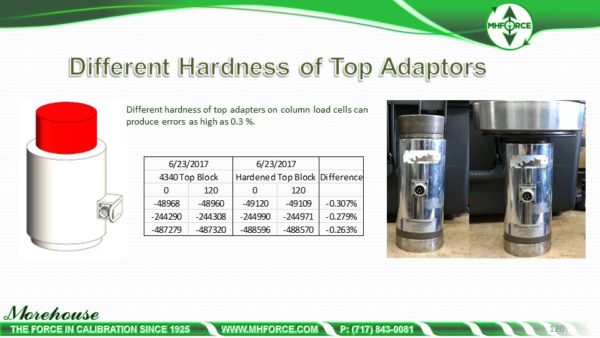
Using a top adapter with a different hardness value may affect the strain level in the load cell column or web; and, therefore, result in different measurement outputs. We have observed errors of up to 0.3 % from varying the material on top compression pads. We highly recommend the end-user send us the top adapter they are using with the load cell and even load cell bases. If either adapter is not ground flat, additional errors could result. We have conducted several tests and have found repeatability errors to be about 3 times higher when the compression pads or load cell base is not flat. Morehouse has a full machine shop and can grind top adapters for a nominal fee (typically $40 to $45 per block).
Real-World Example: A customer brought in a 1,000,000 LBF load cell for calibration. Morehouse performed a calibration. The load cell's output was recorded as 1,500 LBF higher than the previous calibration for a force applied of 1,000,000 LBF.
Is this a stability issue or an adaptor issue?
After calling the customer, we were informed a new top-loading block was supplied with this load cell for the current calibration. When we told them what was happening, they sent the original top-loading block. When tested, the original block resulted in an output of 1,000,180 LBF when loaded to 1,000,000 LBF.

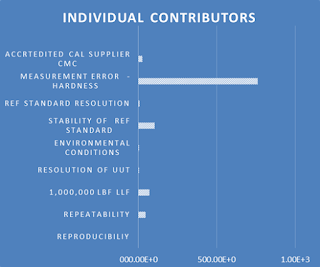
Load Cell Measurement Errors Figure 2 Individual Uncertainty Contributors Graph
When using the new adaptor and figuring the measurement error between the different top blocks (adaptors), Expanded Uncertainty would have increased from 269 LBF with the original top adaptor to 1,490 LBF using the newly fabricated adaptor. The individual contribution to the overall measurement uncertainty was dominant.
Another Example:
A customer sends in a single-column load cell and asks Morehouse to calibrate the load cell with our adapters. Wanting to make better measurements, we let the customer know that we should use their blocks and there could be a change in the output by not using their adapters. The customer instructs us to use our adapters, and since we are client-focused, we perform the test. The test shows a large variation or change from the previous calibration. The actual error percentage is higher than expected, and we notify the customer. Having a calibration interval decrease from two years is not satisfactory for the customer. Therefore, the customer agrees to send in their top and bottom compression plates, and Morehouse begins to test and test; we test on different days and with different variations of blocks, as shown below. The testing results are the hardness of the material impacts the output of the single-column load cell.

Load Cell Measurement Errors Figure 3 A Slide from Morehouse Force Uncertainty Training
What causes this error?

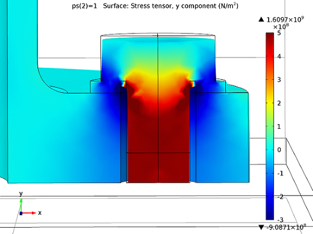
Load Cell Measurement Errors Figure 4 Load Cell Stress Analysis Example
There are two points to make.
#1. Material with different hardness experiences different amounts of lateral deflection under the same amount of load. This causes different amounts of stress between the block and the load cell.
# 2. The flatness and smoothness of the block are important in that they will change the contact position on the load cell. The assumption is the load cell has a radius of maybe R17 and is designed to be loaded exactly at the center of the spherical section, but an unbalanced or nonflat block can shift the contact point off-center. As the stress analysis above shows, a small amount of shift will change the stress distribution. The key is to use the same adapters in use as used in calibration. The adapters should be manufactured not to produce off-axis loads.
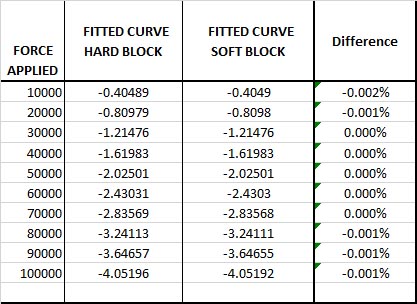
Remember when we asked, "Can a load cell adapter plate or block be interchanged without introducing additional error? " and we said the answer was maybe? Well, on a Morehouse shear web load cell, the differences in using different top adapters are likely to be less than 0.003%. We ran a similar test using materials of different hardness. The data for that test is below.
Running a test with three different adapters and hardness profiles yielded a maximum difference of about 0.002 %. We have done this test on shear web load cells with integral adapters installed and varied the adapters with around a 0.005 % difference. These were adapters that were threaded onto the load cell. For simplicity, the above table only shows the difference in deflection of the calibration curves using a similar type of adapter and only varying the hardness.
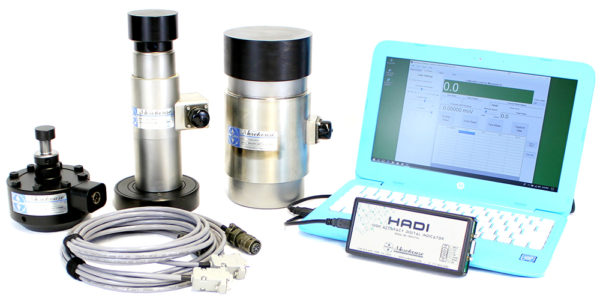
Load Cell Measurement Errors Figure 5 Morehouse 200 lbf through 600,000 lbf Concrete test Kit with the Proper Adapters to Ensure Reproducible Results and Limit Measurement Error
Load Cell Measurement Errors - Top Block Adapter Hardness and Flatness - Conclusion
Different types of load cells will react differently to the hardness of the adapters. The Morehouse shear web-type load cell performed the best in this test case with an additional error of less than 0.002 %. The top adapter tends to be the most critical component and can change the output of a force-measuring device by amounts of 0.3 % or more.
The two examples on column-type load cells show real-world examples where the overall expanded uncertainty was dramatically larger than what one may expect it to be. In both of these examples, the customer expected the expected performance of the load cell to be better than 0.025 % at capacity. In reality, the errors were five to ten times larger than what the customer expected.
If these force-measuring devices had been used for calibration, there could have been failures. Failures in testing may have resulted in bad products being passed as good. Failures may have impacted the lives and safety of several people. In keeping with our purpose of creating safer work by helping companies improve their force and torque measurements, we urge anyone making force measurements to pay attention to the adapters they use and to send those adapters in at the time of calibration.
If your adapters are not flat or you need to purchase a top adapter for your load cells, our team can help you start making better and consistent measurements today. Plus, pairing a top adapter with a load cell can improve stability and often extend the calibration dates. Thus, less frequent calibrations equal more overall cost savings and a safer world.
If you enjoyed this article, check out our LinkedIn and YouTube channel for more helpful posts and videos. Sign up for our free weekly online calibration training here.
Everything we do, we believe in changing how people think about force and torque calibration. Morehouse believes in thinking differently about force and torque calibration and equipment. We challenge the "just calibrate it" mentality by educating our customers on what matters, and what causes significant errors, and focus on reducing them. Morehouse makes our products simple to use and user-friendly. And we happen to make great force equipment and provide unparalleled calibration services.
Wanna do business with a company that focuses on what matters most? Please email us at info@mhforce.com.
#Load Cell Measurement Errors
