Why Don’t My Load Cell Force Measurements Match My Calibration Report?
You send your load cell out for calibration. When it returns, you begin using the load cell but notice that your measurements don’t agree with what the calibration lab reported. Why is there a discrepancy?
This question has been posed to us in slightly different ways by many different companies. After looking into multiple scenarios, we found three recurring reasons for the discrepancies.
- They used mass weights instead of weights adjusted for force.
- The equipment they used to generate the force was not plumb, level, square, rigid, and with low torsion.
- Their calibration provider did not calibrate the load cell in a manner that replicated actual use.
The first two issues have been covered previously in our blog Using Mass Weights to Calibrate Force Devices Can Result in a Large Measurement Error and eBook Force Calibration for Technicians and Quality Managers. If you are using weights adjusted for force and your equipment is plumb, level, square, rigid, and with low torsion then you may need to look at how your calibration provider is calibrating your load cell.
Unfortunately, many calibration providers do not calibrate equipment in a manner that replicates actual use. In this blog, we will reveal common error sources and how calibration setups can best replicate field use. Specifically, field use in the context of performing calibrations following ISO 7500 and ASTM E4. Though, it is essential to have the calibration provider replicate use in almost all situations. Not using similar adapters with the proper hardness, like conditions, and setups can drastically alter the output of many mechanical instruments.
Common Error Sources in Force Calibration
The end-user of the force-measuring instrument must ensure the laboratory performing the calibration replicates how the instrument will be used. Figure 1 is an example of a calibrating machine that may not replicate use because it performs tension and compression in the same setup without using different adapters for each mode of operation. If the calibration laboratory uses different adapters and independent setups for compression and tension, then it can replicate most field use cases. However, this takes more time and raises the cost, so it is done infrequently unless specifically requested by the customer.
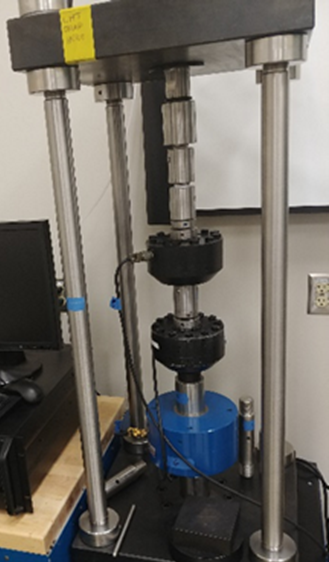
Figure 1: Compression/Tension Machine that May Not Replicate Field Use
Fixtures and adapters used with a force-measuring instrument may significantly contribute to the force-measuring instrument's overall uncertainty. Morehouse has observed errors as high as 0.3 % of the output using top blocks of different hardness. Common error sources for force calibration include:
- Not using independent setups for compression and tension when calibrating to ASTM E74 or ISO 376.
- Alignment, which can be overcome with proper adapters
- Using a different hardness of adapter than was used for calibration
- Using different size adapters than what was used for calibration
- Loading against the threads instead of the shoulder
- Loading through the bottom threads in compression
- Temperature effects on non-compensated force-measuring instruments
- Temperature effect coefficients on zero and rated output
- Cable length errors on a four-wire system
- Using electronic instruments, such as indicators, that were not used during calibration
- Using an excitation voltage that is different from the voltage used at the time of calibration
- Variations in bolting a force transducer to a base for calibration while the application is different
- Electronic cabling regarding shielding, proper grounding, use or non-use of sensing lines, cable length
- Failure to exercise the force-measuring instrument to the capacity it was calibrated at before use
- Difference between the output of a high-quality force transducer when compared to the current machine and realized value from the deadweight calibration
- Not replicating via calibration how the equipment is being used
You can learn more about these error sources and how to correct them by checking out other Morehouse articles, videos, webinars, and other training courses, including on-site courses.
For almost all calibrations independent setups are required to calibrate the testing machine following ASTM E4 or ISO 7500 requirements. Therefore, we will focus on what happens when you do not use independent setups for compression and tension when calibrating to ASTM E74 or ISO 376.
Calibration Using Different Setups for Compression and Tension Replicates Field Use
It is best practice to replicate field use when calibrating a force-measuring instrument. In order to replicate field use, different setups must be made with different adapters for tension than for compression. Figure 2 shows a compression setup and Figure 3 shows a tension setup.
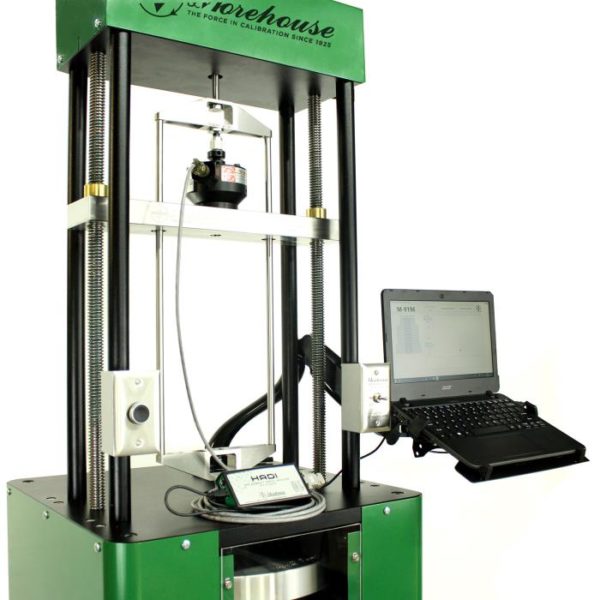
Figure 2: Example of a Compression Setup
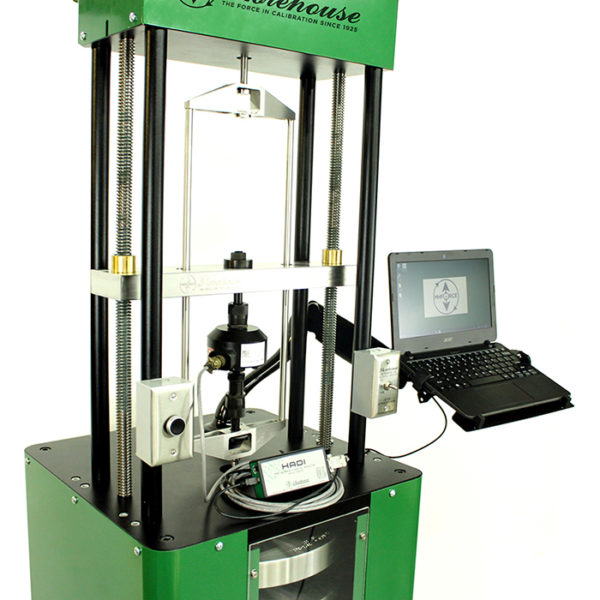
Figure 3: Example of a Tension Setup
These are drastically different setups from the machine in Figure 1, where compression and tension are done using the same setup.
Knowing the importance of replicating field use, the ISO 376 standard has specific guidance on adapters. However, the ISO 376 recommended adapters do not include one that can be used for both compression and tension calibrations.
Most testing machines calibrated to ISO 7500 or ASTM E4 are calibrated in compression and tension. Technicians use different setups for each mode and should use calibration adapters as recommended in ISO 376, “Loading fittings should be designed in such a way that the line of force application is not distorted. As a rule, tensile force transducers should be fitted with two ball nuts, two ball cups, and, if necessary, with two intermediate rings, while compressive force transducers should be fitted with one or two compression pads.”[1]
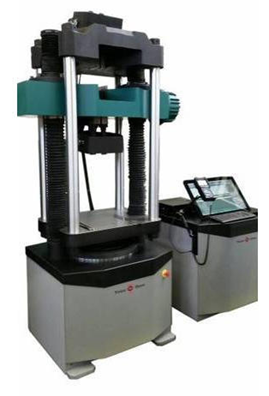
Figure 4: Tinius Olsen Universal Testing Machine
Figures 5 and 6 below are examples of tension and compression adapters manufactured by Morehouse using the recommendations from ISO 376.
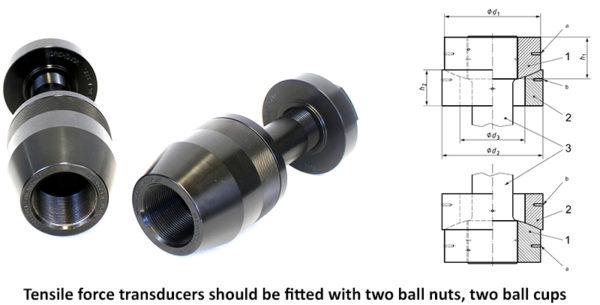
Figure 5: Morehouse Tension Adapters Designed using Recommendations from ISO 376
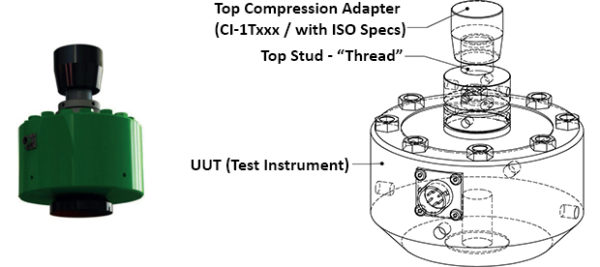
Figure 6: Morehouse Compression Adapters Designed using Recommendations from ISO 376
Replicating field use gives the end-user confidence in their measurements. With a Morehouse Universal Calibrating Machine (UCM), the user is forced to change setups for compression and tension, thus reducing common errors that many other machines allow for. Like other Morehouse machines, the UCM allows the end-user to best replicate how the equipment is used in the field, such as different setups for tension and compression, and uses proper adapters that follow the recommendations of several published standards.
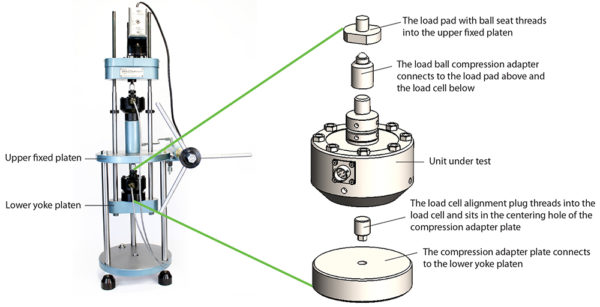
Figure 7: Morehouse Universal Calibrating Machine showing a compression setup for the UUT
Other machines that perform tension and compression in the same setup may not apply the force for 30 seconds as specified in the Time/loading profile in both ISO 7500-1 and ISO 376. This is one reason why most NMI force standard machines have separate areas for compression and tension setups.
Additionally, a dynamic machine does not replicate use field use. Dynamic force is different than static, and a dynamic machine should not be used for calibration following ISO 376 which states, “This International Standard concerns only static force measurement. If the force-proving instrument is used under dynamic conditions, additional contributions should be taken into account. For example, the frequency responses of the force transducer and indicator, and the interaction with the mechanical structure, can strongly influence the measurement results. This requires a detailed analysis of dynamic measurement, which is not part of this International Standard.”[2]
Reducing the Discrepancies
At Morehouse, we take several steps to ensure that your measurements agree with what our calibration lab reported. First, we ask our customers how the equipment is used so that we have the best chance of providing reproducible results. Next, we have the appropriate equipment and adapters to replicate field use. Lastly, our calibrating machines are designed to allow the end-user to replicate the majority of field use cases best. To best replicate field use for a calibration performed following ASTM E74 or ISO 7500, at a minimum the following should be done during calibration:
- The calibration laboratory should not perform compression and tension calibration in the same setup. This is a common practice because it is much quicker.
- The calibration laboratory should use the customer's top blocks and use separate compression setups
- In compression, the calibration laboratory should require a baseplate to load against
- For tension calibration, if the end-user is calibrating per ISO 7500, then they should use adapters recommended per the ISO Annex
- During contract review, the calibration laboratory should verify how the end-user is using the device
To learn more, check out our new e-book available on Amazon titled Force Calibration for Technicians and Quality Managers. It contains guidance on factors that ensure repeatable results through the entire measurement chain. For force-measuring devices, there are various mechanical and electrical interfaces that matter. At the time of calibration, these consist of:
- Selecting the proper calibration method
- The loading conditions
- Adapters
- Verification of the adjustments
- Meters
If you enjoyed this article, check out our LinkedIn and YouTube channel for more helpful posts and videos.
I take great pride in our knowledgeable team at Morehouse, who will work with you to find the right solution. We have been in business for over a century and focus on being the most recognized name in the force business. That vision comes from educating our customers on what matters most, having the proper discussions relating to reproducible results, i.e., replicating how you are using the equipment.
Everything we do, we believe in changing how people think about force and torque calibration. We challenge the “just calibrate it” mentality by educating our customers on what matters, and what causes significant errors, and focus on reducing them.
In addition, Morehouse makes simple-to-use calibration products. We build excellent force equipment that is plumb, level, square, rigid, and provide unparalleled calibration service with less than two-week lead times.
Contact us at 717-843-0081 to speak to a live person or email info@mhforce.com for more information.
- ISO 376 Annex A 4
- ISO 376 Section C.2.11
# Force Measurements # Load Cell #Measurement


