The Morehouse team can calibrate your hardness tester.
The main advantage of Rockwell hardness testing is its speed of testing and its ability to display hardness values directly after penetrating the material.
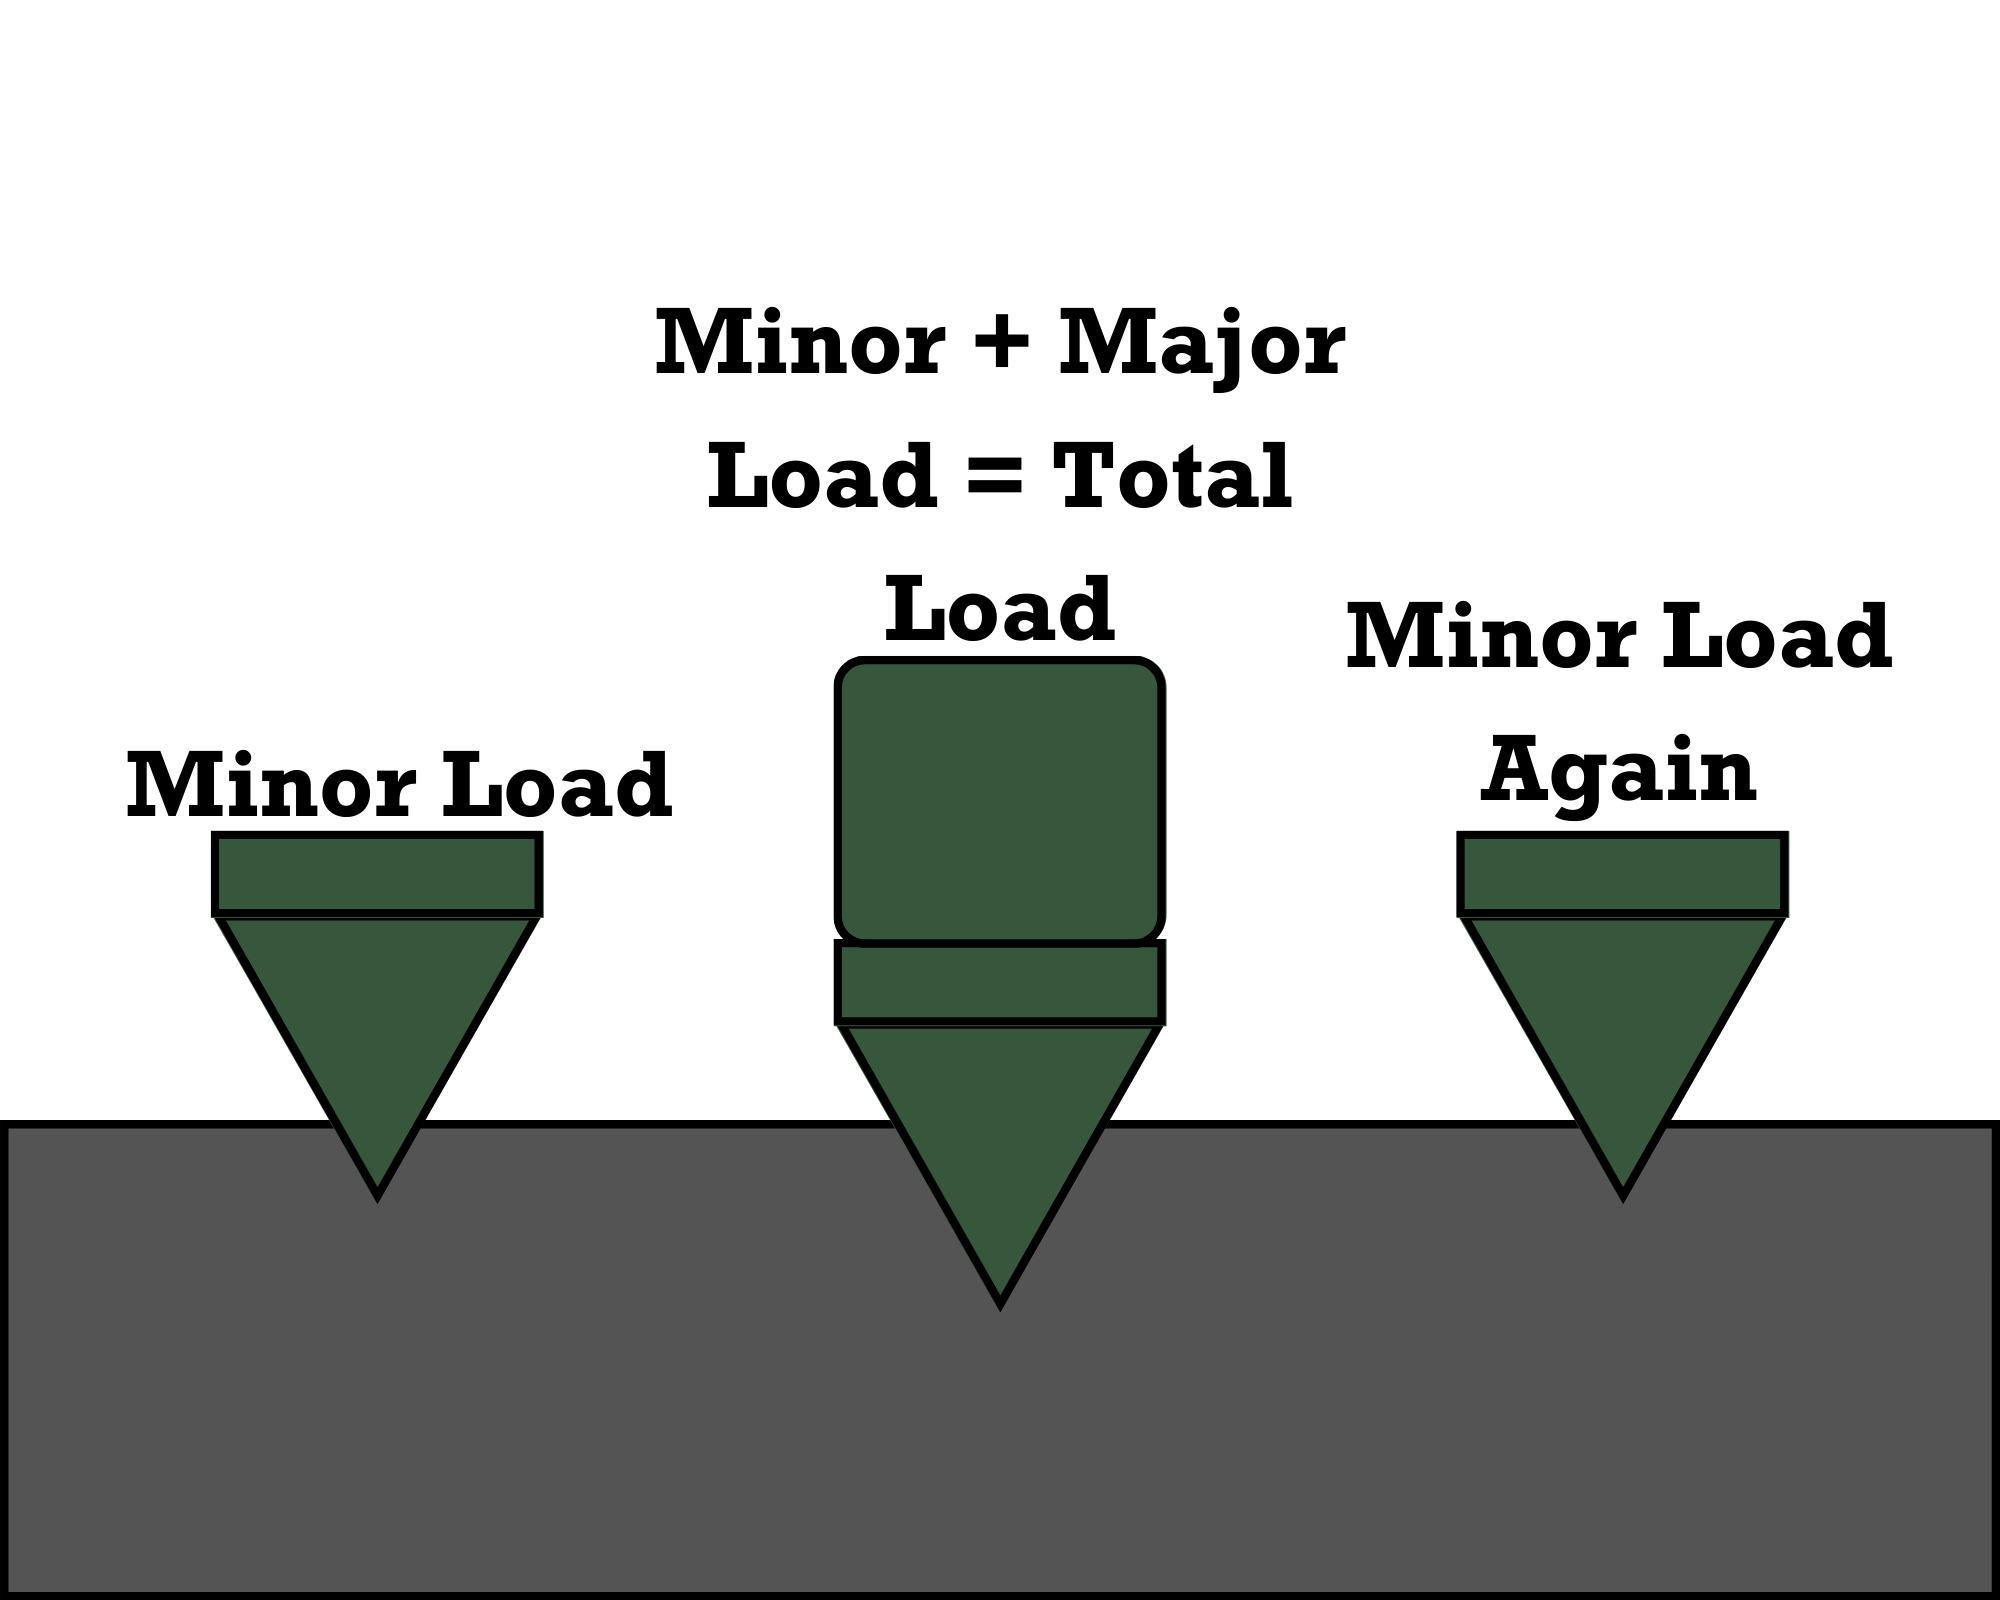
The Rockwell hardness is determined by the application of a preliminary test force, followed by an additional load to reach the total required test load.
Morehouse uses deadweight primary standards to assign class AA calibrations as required per ASTM E18-22.
These calibrations are often performed in our small deadweight machines, easily capable of generating forces from 1 kgf through 3000 kgf.
Rockwell hardness methods are defined in ISO 6508 & ASTM E18.
They are probably the most commonly used method to determine a material’s hardness since it is suitable for almost all metals and, to some extent, plastics.
Rockwell test measures the permanent depth of indentation produced by a specified force/load on a specified indenter and requires the least amount of sample preparation, making it the quickest and easiest hardness test to perform.
The main advantage of Rockwell hardness testing is its speed of testing and its ability to display hardness values directly after penetrating the material.
The Rockwell hardness is determined by the application of a preliminary test force (minor load or preload), followed by an additional load (major load) to reach the total required test load, and finally returning to the same preliminary test force (minor load).
The first minor load provides the zero or reference position. The major load is applied and held for a predetermined amount of time (dwell time) to allow for elastic recovery.
Then the major load is removed while still maintaining the minor load to establish the change from zero or reference position in determining a Rockwell hardness value.
For those following ASTM E18-22 for Rockwell hardness testing, section A2.6.2.1 states, " Verification of the Test Forces—For each Rockwell scale that will be used, the associated forces (preliminary test force, total test force, and test force during elastic recovery) shall be measured.
The test forces shall be measured by means of a Class AA elastic force measuring instrument having an accuracy of at least 0.05 %, as described in Practices E74."
This is where Morehouse can help with supplying load cells and calibration as Class AA calibration means that done using primary deadweight standards.
Follow Morehouse on LinkedIn, Facebook, and YouTube for more updates.
